Saturday, October 12, 2013

Wyatt's Cuff


It was 2002 and I was in the lovely country of Italy with my boss Mr. Robert Mednikow and a small clan of other employees from Mednikow Jewelers of Memphis, Tennessee. I was the custom jewelry designer there and we were on a buying trip.  Bob (Mr. Mednikow) was a wonderful and gracious traveling companion for the most part.  He did like to have things his way but I guess that was to be expected given his position. Anyway during the trip we were seeing all the very latest jewelry fashions that the Italians had to offer. As it turns out Bob had lots of connections at the jewelry show and it seemed everybody knew him.

One day he introduced me to Pippo Perez, a flamboyant jewelry and watch designer. Bob and he were taking about a new line of leather goods that Pippo was showing and Bob was narrowing down his choose on an exotic purse for his wife, Betty.   I was distracted by Pippo's new watch line “Lucky Time” and was galvanized by one wrist watch in particular. It was dramatic, tailored and it had the most unusual leather band. The band was made of polished stingray leather. I had never heard or seen such a material. It was beautiful and filled with detail. A bit like ostrich leather but on a much smaller scale. That night at dinner Bob told me that he had bought that very watch and he wanted me to have it. Wow that was cool ( I did mention that he could be gracious, right?) and it was years before I saw any other pieces of stingray leather, aside from Betty's purse. Yes, it was made of stingray as well.

I can testify that I am not gentle with any of my jewelry. I guess it's because I can effect repairs myself if any thing goes awry. Anyway, after all these years that stingray strap looks about the way it did when I first put it on. The stuff just wears great and ages gracefully.

Philip's son is Wyatt and he was to have a cuff with a band's “glyph” on it as well. I had been wondering what I was going to do to match the sexy coolness of Philip's cuff of Mokume Gane. Of course you can see where this is going. The stingray leather cuff with some sterling accents was going to be a fairly straight forward project and it also solved the problem of resizing the piece as Wyatt grew. It was also fortuitous because Chloe's project was next and it was going to take considerable time. Thank goodness stingray leather is available at most leather shops these days, you can even order it from TandyLeather. I highly recommend that you seek out some of this material. Wyatt's cuff should serve him well and it will easily adjust to fit him as he grows.


Tuesday, March 19, 2013

Mokume Gane Cuff for Philip


Mokume Gane is a Japanese term that roughly translates to mean “wood-grain in metal”. It was always one of those ancient mysteries of the orient. Primarily it was a metal billet formed from layers of metals that varied greatly in color. These billets were then shaped and deformed to bring out brilliant patterns on the surface. This metal technique was seen mostly in the furnishings of samurai swords. These uses included handles, guards and the sheaths of these weapons. Mokume Gane was highly secretive process that was passed on from artisan to artisan in an oral tradition.

The process of forming these multilayer billets predated technology and as such the process was controlled and duplicated by religious constraints. The temperatures were often regulated by the colors of a rising sun and the timing by the length of a chant or song. Oral traditions are easily broken as the number of participants dwindle. By the beginning of the twentieth century the secrets of Mokume Gane were thought to have passed beyond recall.


Fast forward to the rise of “Metal Arts” in American colleges and Art schools during the late sixties and early seventies. During this time period there was a wide spread attempt to reproduce the look of Mokume Gane using modern techniques. Many artisans used layers of different colored metals soldered together with silver solder to mimic the ancient art form. The results these efforts produced were very limiting, superficial and mostly unsatisfactory. There were wide spread rumors in the metal art world of individuals that wanted to make excursions into the orient to interview the old artisans of the knife guilds to try to glean some of the old ways. It was a hope that this information might result in a translation of the old oral tradition into modern metallurgy. It is not the scope of this article to explore who went where and discovered what. It is a fact however, that today one can obtain information that will result in a very satisfactory Mokume Gane billet regardless of how close it adheres to the materials of the seventeenth century. I bring your attention to the materials, publications, classes and lectures of such metal artists as Steve Midgett, James Binnion and the metal wizard I have watched closely, Phillip Baldwin.

Speaking of “Phillips” my client Philip wanted us to make a cuff for him that would turn heads and start conversations. He wanted something classy but still with a lot of eye appeal. I thought that Mokume Gane would be just the thing. I have always admired subtle things like fine Irish linen, where the closer you look the more there is to see. Sometimes you have to just sit back and let the material do the talking.

The cuff form itself was shaped in a hydraulic press with tooling that I made myself using magnets and mild steel. There was a lot of experimenting using copper and brass blanks to get the shapes and lengths just right. It was more than once I nearly gave my finger a good pinch in the press. But after a bit of time, some patience and a bunch of tweaking the project started to come around. My hydraulic press is an old “Bonny Doon” from years ago. We don't use it as much as we should and sometimes we even forget that it's in that far dark corner of the studio just under the breaker panel.

My plan was to keep this piece fairly simple and rely on the materials and “glyph” to do the heavy lifting. This is the Mokume Gane cuff that I made for him with the ever present band “glyph” on top.
 

Monday, March 18, 2013

A New Piece for Susan


We have a client that calls on us about once a year to make some very cool pieces for his family. It turns out that they (the entire family) are big fans of a particular band that is “off grid”. And as such, this band has an entirely different kind of following. Many of these followers will go from place to place as the band pays different venues. The band has it's own tee shirts, albums, cd's, and basically all sorts of merchandise including their own tequila. Our client, Philip sends us what he calls “glyphs” and gives us a few hints as to colors, type of jewelry wanted and price range and then we “dress up” these “glyphs". This year was a banner year for this project. We were allow a generous budget and the choice of materials was wide open.
 
Susan, his wife was to get a necklace and seashell and the “glyph” were the only parameters given. Well I have always wanted to work in Paua shell inlays. The Paua shell is really the colorful iridescent inside area of an abalone shell. I wanted to use the greens and blues often found in this enticing material.
I had to do a lot of research in a hurry to know what was needed and what the procedure was for turning the chunky abalone shell into the fine thin colorful inlay material I needed. As it turns out, the dust created when you grind away the over burden from the shell is very toxic. Please do not try this without a through investigation. I found the technical staff at RioGrande an invaluable resource for many of the aspects of this project.
After building the center element using a curved sided triangle as a focal element I then finished the tedious process of the inlay. I then covered this element with the “glyph”. All that was needed now was the stringing of the “Raven's Wing” pearls and the sterling letter blocks. The overall effect was rich and almost intoxicating not entirely unlike that of an exotic dark chocolat (apologies to Joanne Harris).
 

Monday, January 21, 2013


A Greenleaf for Ed


My buddy Ed gave me an old gold ring of his a few years back. I always wanted to reuse the gold in making him an "Art Pin" that he could wear to openings and parties and such as that. I just couldn't think of what would be appropriate for him to wear. But e few weeks ago just after Thanksgiving an idea came to me.

I remember visiting the “North Carolina School of Performing Arts" many decades back...as mater of fact...back in the 70's in my serious hippie daze. One of the drills the instructors would used to strip your personality away so you could over print the role of the person you were to play was to make your own name unimportant. They would train you to do this by making you repeat your name out loud over and over again to the class for 5 minutes or so. Try it some time (but maybe in the privacy of your own home). After a few minutes your name starts to be just a bunch syllables. It starts to lose importance and even meaning...just a bit of noise. In any case the same thing happened to me with Ed's last name. I had heard and used it so often over the years that I had forgotten how unusual it was...”Greenleaf”.

The solution for the subject matter of the “Art Pin” was of course now very self evident. It just had to be a “green leaf”. So I charged into the task armed with some room temperature curing specialty resins the gold from his old ring and some sterling.

I wanted the outline of the leaf to be very stylized and simple but I wanted the surface to look very rich. Kind of like the look of a dollop of mint jelly in a silver spoon. The first sample was okay but it lack the lush look of jelly. The images I had seen of Basse Taille enameling where the back metal surface is engraved or carved before the enamel applied was what I was after. A heart bur was just the ticket needed to cover the background silver with a field of “poppy seed” bright cuts to reflect the light back through the enameling.


After a few more test runs the finished product was just what I had hoped for, a “green leaf” pin for Ed.


Thursday, June 30, 2011

The Rain Chain that Splashed


A while back a lady from Port Townsend asked me to makes a set of four matching hooks. She wanted to put two hanging baskets on either side of the entrance to her bungalow. She couldn't find anything in the local "big box" store that had any character. She was also very particular as to the length of each long hook.
It was a project that I knew I was going to have fun with and I was all over it. It was fairly wide open and really a hook is a very straight forward devise that easily succeeds. Conceptually I gravitated towards the idea of a vine. We used to have this native clematis vine that got into a holly tree and went crazy. It was ascetically beautiful but it was chocking the life out of the poor holly. We were forced to cut it back severely. But I still missed the way it looked. My new hook for the potted plants was to borrow that twisted vine look.
Trying to satisfy my customer...I made many of these vine hooks in various lengths and hung them one under the other suspended from the gutter on our house so I wouldn't forget to take them to the street fair the next Saturday. As soon as I hung the up and stepped back I realized that I had made a "rain chain".  The lady with the bungalow was delighted and took all the hooks I had made. 
Since this is the year that I decided that I was going to start keeping and using my own art in my own yard, I have made a bunch more of what we now call the "rain chain" link.  I have been using these "rain chain" links all over the yard. Really, they don't do anything that a bent coat hanger wouldn't do...but they sure do look better. I particularly like them chained together and hung under the Maple tree out back like a vine. It's like a vine that never dies and never grows. And a vine that never dies is cool but (since our adventure with the native clematis and the holly tree) a vine that never grows is way better.

I have since discovered that if you open up the hooks at the ends...the links will fit over the outside of the rain gutter. This makes them absolutely fantastic for positioning bird feeders and the like so they are squared up in front of a window and close up enough so you can watch
those little scamps playing around. You also get the added advantage of being able to easily move them around without putting a bunch of drill holes under your eaves.
So just about now you are asking yourself...this has been a nice little story ...but what about the "splash" that was promised in the title? Well Dungeness Studios is in Dungeness, Washington and we only get about 9 inches of rain a year. So this "rain chain" works great for us. But I wanted to test it out in heavier rain conditions before offering it to other people as a "rain chain". So I climbed out on the roof and using the water hose I ran a bunch of water into the gutter to see how it worked with a real "toad choker" of a rain. It unfortunately, was a splashy failure in heavy rain. But it still works great here in the "blue hole" rain shadow and I love them as decorative hooks. We are always finding another way to use them and would love to hear how you are using yours.  By the way, The finches love to sit on the different loops in the vine as they work their way down to their turn at the feeder.

Tuesday, June 21, 2011

The "Snail Army"


One of my very first projects at Dungeness Studios was getting our garden shaped up for it's first season. For those of us that garden we know that the first year can be really busy and entirely too short. I wanted to get the lay of the land before starting this protracted endeavor so one of our first local trips was to the Hoh Rain Forest. There we were introduced to one of the Olympic Peninsula's more infamous inhabitants...The snail and his giant cousin the slug. My goodness you could throw a saddle in one of these bad boys and ride them home in a pinch. Well I had met the enemy and they were mighty. So I started my research of them.

It turns out that there is a widely held belief that if a snail or slug tries to cross over a strip of raw copper will cause some sort of galvanic response and the critter will turn around and find another course to it's meal. Being a jeweler I certainly had a readily available supply of copper and being a member of the junior league of scientists...I still have the secret decoder ring to prove it...I set up an experiment. I put both slugs and snails on top of a stump I use for forming copper and surround them with a triangle of copper strips. I then got myself a stool and a pair of magnifying visors and sat down to make my empirical observations. I am here to tell you that they didn't stop and turn around...they did try to arch over the copper...they didn't even flinch in the slightest. They just slimed their way on over to the other side. So much for that "Old Wives Tale" as Kari would say on the Television show "Myth Busters" it was "totally busted".

Now as it turns out, my plan B was to be very interesting indeed. I decided that instead of engaging this multitude in battle...I would celebrate their tenacity. I started making a little pieces of "garden art" that would pay a small homage to these stalwart denizens of the damp and decaying. I turned to red hot steel, the anvil and the hammer. I began forging one steel snail after another making about a dozen before I started to slow down. They were flying off the anvil due by a large measure to the simplicity of the form. I was happily applying a drawing skill that we often used in undergraduate art school. The drill was called economy of line. Basically it means to try to convey visually a concept using as few lines as possible. And so the basic image of my garden snail was reduced to just two lines. One of those lines was to also be the stand that set it into the garden. As these individual units began to pile up in the garden I came to realize that I was building a "Snail Army". And just like in boot camp...these new recruits looked very confused. Some looking one way while others were looking behind them. Some were even cross eyed. Some looked like they were toiling their way uphill while others looked to be headed helter skelter like a run-a-way train down hill. Then it came to me, I had to be out of my mind. There was no way that I was going to build snails and voluntarily install them in my garden. There had to be some kind of return on the effort. As my buddy Eddie would say, "It ain't gonna happen". I needed something...some task that this little army could help me with...some positive contribution to the whole.


As you probably know from previous posts...we live in a Rain Shadow called the "blue hole". It can be a heart warming to come home from a long trip through two hours of rain in the south to find sunshine as we round the bend and return to cabin 82. But only 9 inches of rain per year also means you have to be prepared for watering. "Taadaa" I'll teach these little devils to hold the water hose for me. Okay...I realize that holding a water hose is not exactly highly skilled labor but let's face it...they are snails. There's not a lot up there to work with. A few of the solders in the "Snail Army" picked up on this (now mandatory) skill and soon the entire corps was in step so to speak. Now we gardeners know there is a great multitude of sundry devises for watering a lawn or garden, but where the "Snail Army" has the strategist advantage is small jobs. Maybe you have a newly transplanted tree that needs watering in or just a tiny bit of weeding in your strawberry patch could use some softening, the "Snail Army" stands ever at the ready. Just hand them a hose and sit back with your glass of iced tea and wait.

Saturday, June 18, 2011

the beach rocks...three stone necklace


Ever since we started making the distinctive rings in this series, I have wanted to do a five stone necklace in the same style. I started building the necklace on Tuesday and quickly realized that it was going to be too heavy for what I was wanting. So the three stone necklace came to be.

It has all the smooth clean and tailor lines that were in the rings. I added a toggle catch to give it the versatility of being worn in two different lengths. I really like the weight...it feels like a substantial piece of jewelry without being a burden to wear. The colors...which may not show up all that well in this presentation, are a medium black beach rock in the center with very dark green rocks on either side.
I still want to make a five element necklace using beach rocks...it occurred to me while building the three unit piece that I could make some hollow "rocks" out of silver to use as spacers and help keep the weight down. I have some ideas about a more outrageous looking chain as well. I can hardly wait to see the next generation in this series.

Sunday, April 24, 2011

New Earrings for May 2011


The "Seafoam" pendent has been very popular with the people that visit our display at the "Port Townsend" Market. We have made it many times with a variety of different beach rocks that we have collected from various venues across the Olympic Peninsula. We have had many requests for more pieces in the "Seafoam Series".
The "Seafoam Series" is a celebration of how plain seawater can get churned up into a froth much like egg whites can be beaten into peaks. This froth can then be blown about and gather into remarkable large roundish forms embellishing itself with bits of driftwood, sand and shells as it tumbles along above the tide line. Pat and I first saw this phenomenon at Shi Shi Beach awhile back. The outside of these foamy objects can start to dry out and become quasi solids making a leap from the liquid state over to a quite dry and solid state. They can even begin to pile up on the windward side of the logs and heavier debris.

These dangle earrings are the new additions to the series...they are shown here done in sterling silver and Aventurine.
Aventurine is a dreamy semi translucent light green material that has little flecks of a type of mica called fuchsite. These little flecks reflect light back to the viewer giving the stone a shimmering quality. Although it can be found in other colors (orange, yellow, brown and even blue) we have chosen the green because of the beautiful hue of the sea on that totally fabulous day
we first noticed the foam at Shi Shi Beach. We certainly are looking forward to finding other materials (maybe an Aquamarine) that would look good in this earring.

Friday, July 30, 2010

Lake Sutherland


We had a surprise visit from James A Wallace and Mary Lee Hu this week. Wally announced that they would only be here for a few days and he wanted to ruin his health fishing and by Jimmie I set out to do just that. I called my “always ready for a fishing challenge” buddy John Dash and we put together an outrageous agenda. The first afternoon was spent in his little boat setting ring nets for Dungeness crab in the Dungeness Bay and just how cool is that. And thank goodness for GPS handhelds...the fog was extremly heavy and it was right at twilight when we pulled the last net. We raced home...four blocks...dumped the boat...changed clothes and struck out to jig for squid at the Port Angeles city docks and maybe set a couple of shrimp pots to to make sure we covered all the bases. The shrimp pots turned out to be a sterling idea because the always allusive squid didn't show up for the party, but we at least had them shrimpies to show for what we had been doing til 1:30 in the morning.


We popped outta bed the next morning...for those of you that are buying the idea that we "popped" outta bed, I have a bridge I would like to sell you...and loaded the boat for a trip to Lake Sutherland. Our targeted fish was the Kokanee sockeye salmon. The weather was beautiful and the fish were willing. Mary soon discovered that the water in the boat kept getting deeper but thanks to her unending diligence and an empty Vienna sausage tin we stayed afloat out on the lake. The fishing was done with the most ridiculous rig I have ever put on the end on my line. The locals call it "Christmas tree lights with a wedding ring". It was a long line of four or five spinner spoons which went on for about three feet...follow by another section of line (about 1 1/2 feet) that had an array of bright orange beads separated in the middle by two gold bands with a ring of faceted crystals set between them which looked much like a channel set wedding band in miniature. No matter how strange the apparatus...within a few hours we all got our limit. We called home to tell the Pat and Cynthia to get ready for a seafood feast.


Everyone was fast to prepare the side dishes that we were well known for or at least we had a considerable comfort zone about pulling it off...shrimp fried rice...fresh corn in a butter sauce...crab on toast...artisan bread and a beautiful fruit tart...but we were all dragging our feet over commenting to the preparation of the main dish...the Kokanee salmon. All of us had considerable dose culinary pride on the line and we were all very tired from “ruining our health”... not to mention a large measure of libations. Then almost at the same moment in time three of us said “here...I'll do it” and the next thing you knew three new “main” dishes were presented. It was one of those magical events where everything came together at the same time. Baked salmon in lemon butter...pouched salmon in vinegar and pepper and steamed salmon with ginger and onion. We could not decide which was the best. Another great evening capped by a great meal.

Friday, June 25, 2010

"A Passing Summer"


This is another encaustic jewelry environment piece. Out here on the Northern Olympic Peninsula there is a very small group of artists that get together every so often to exchange ideas and thoughts. We call ourselves “ A Fine Disregard”. We usually have a theme or a thought that we all translate into a piece of work. And that is the focal point of the meeting. “ A Passing Summer” was the theme a few months ago and this is what I did for that encounter with “ A Fine Disregard”.

The main branch like elements are made of hand forged steel. The smaller elements are made of copper. By some divine intervention...and I'm sure there are artists out there that know what I'm saying here. The bluing on the steel was very nearly the same finish as “liver of sulfur” on copper.

There is one small jewelry element that comes off the “environment” and you can borrow it for your personal adornment. When you are through using the broach it is returned to it home on the wall. I was lucky enought to get this piece into two shows this summer.

Quick Response Codes


Wow the world is certainly a different place from thirty years ago. I remember talking to a code writer back then about how cool it would be if the internet would “catch on” and look at all the stuff out there now. We are already getting results from this code. People can stand down the isle from our booth at the markets and scan our QR code and being talking to us by the time they walk up.

New posting coming up soon.

Wednesday, March 24, 2010

Chardonnay/Beer/Champagne

This posting is mostly for those people on FB that were asking how this project was proceeding.
Facebook was not playing nicely with me when it came to uploading images so I have chosen to present them in this format which seems to always work.

Encaustics are intriguing to me. I used to do off hand blown glass and just love messing with hot stuff. So the idea of making a mark and then floating that mark around inside molten translucent strata gets a gold star on the refrigerator in my book. I am a rank beginner in this art form and I make no inference here that I know what I am doing. But my loving the challenge so far. So here goes...

In this first image the cradle (24 X 18) is made of birch door skin and some old growth fir for stretchers in the back. The board has been heated and then primed with beeswax and then cover with a white wax medium to give me a clean smooth surface to start. I have then inscribed the surface with a stylus to cut in the bottle silhouettes. I then used an oil paint stick to force a pigment into the recessed incised lines. This is then heated with a heat gun to trap the pigment in the wax strata.

The next image shows the colors that have been added bit by bit and layer by layer. There is a fusing process that follows each application of wax. In essences you heat each layer and addition of wax to melt it into the surface below it. I have chosen to get everything a little extra hot which causes a “water color” effect. Although I'm sure a water colorist might take offense with that comparison.

In this last image the fused glass panels were made of old broken bottles that were then laid out in a borrowed kiln into rectangles and fused together. This was a very open arrangement and it has lots of open space between the individual pieces. The bottles were loosely grouped as chardonnay wine bottles, brown and green beer bottles and champagne bottles...hence the working title, Chardonnay/Beer/Champagne.

My plan is to next wire the glass panels in place with a soft copper wire. Much like the neon tubing gets wired onto an outdoor electrical display sign. And then a simple flat or semi-flat black frame.

Sunday, March 21, 2010

The Tree Pendent


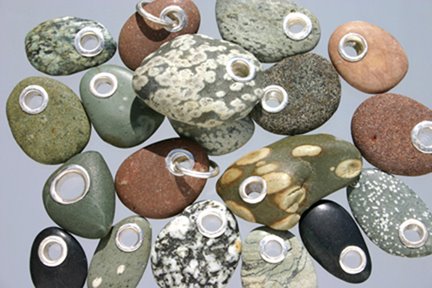
I must admit that we have a fond place in our hearts for the rocks and pebbles that litter the shore lines of the Olympic Peninsula. There is an outdoor work table in the side yard that seems to stay covered with the bounty of our last trip to the beach.

This is the beings of a new steel garden piece. As it was evolving I began to realize that it was just a big...really big... piece of jewelry. In any case, I have decided that it was okay. And so I have re-categorized it as a “tree pendent”. I plan on putting a chain on it in the next few days. But for now I wanted to post it here to document it's start. You see it here laid out on the floor so I can figure out just where the support posts go to hold the beach rocks in place. It still has all the spot welds and forging marks unfinished on it. If you look close you can see where the rocks are numbered with soap stone so I can put the darn thing back together later.

The moment that I realized that it was jewelry was when I went to the trouble of welding the insert...all the twists and spirals, into the frame using plug welds from the sides. This is a clever technique I picked up from working with James Wallace aka “Wally” at the National Ornamental Metals Museum in Memphis, TN. It makes for very clean, neat and very beefy connections which are easily hidden. It is off to the sand blasters for now. I am really looking forward to seeing the “Tree Pendent” completed and gracing the red maple just outside of the studio and smithy.

Thursday, March 4, 2010

Black n Tan


This was a piece made for a show called “Small Works Show” which was sponsored by the Blue Whole gallery here in Sequim, Washington. There has been considerable attention in the local art scene focused on the environment. “Black n Tan” uses a background of “re-purposed” corrugated cardboard. I glued up sections of the material and then cut that into strips, cut those into cubes and glued up the entire sheet. The pink material is copper and the silver color is aluminum. Ah... aluminum the “non metal” metal; I have always avoided it like a bad in-law. But it was recycled as well so it seemed appropriate to use it here. I can not recommend that everyone stop what they are doing and try aluminum out. So far I have found it best used in beverage cans, ladders, small boats and street signs.


There is one element of this piece that can be removed and worn as a pendant. On a triple cord it comes off as a necktie look. The cord is stored in the back of the wall piece. As a post script it might be noted that this piece caused comment because it was hung as a diamond among a wall where everything else was at ninety degrees. I took it down. It's venue will be elsewhere.

Tuesday, December 15, 2009

A Musical Sweep Pin


I have forgotten just how much fun designing pins and broaches can be. The broach designer doesn't have nearly the functional restrictions that the ring designer has. I guess one could nearly do “anything” and then put a pin back finding on it and call it a broach.

This piece was a commissioned by a gentleman in Port Townsend, Washington. He had found this very singular piece of “turtle back rock” while beach combing. The way the matrix fades from top to bottom really fascinated him. He asked me to make a broach for his wife using textured sterling and maybe some moonstone pebbles. I added a dot of blue topaz to help “punch” up the blue in the moonstone. The “sweep” that the moonstone is mounted onto is made of classical sterling while the rest of the piece is made of argentium sterling. The classical sterling takes a dark patina much more dramatically than the argentium and I needed the darkness to make the “play of color” come out in the moonstone.

I'm afraid that I my training in art school was a bit formal and as such nearly all my pieces start as a drawing. As my undergraduate professor C.James Meyer put so bluntly many a time, the most valuable tool any artist has is the ability to draw.

And I have to confess that through the years...knowing where you are trying to go... is a big advantage to bumping along in the dark. Here to the right are some of the final sketchs I made before starting this project in metal.

Thursday, December 10, 2009

"and water cuts rock revisited"


This is the latest in the “and water cuts rock” series. It features a beach pebble that the people in Joyce, Washington call the “chrysanthemum rock”. I like the way the baroque pearls set off the irregularity of the beach rocks. This series has a special meaning for me (see older posts) and I am always thrilled when I see a rock tumbling along in the surf that seems a good candidate.

I do remember the moment I found this particular piece. I was so busy chasing it as it scurried back towards the surf in the receding wave that I broke a cardinal rule of walking in the surf zone. Never turn your back on the ocean. The next wave cut my feet out from under me and I took a good spill into the swirling icy foam. By the time I regained my footing Mama Pacific had reclaimed my bucket, sunglasses, walking stick and a good measure of dignity.

As I picked myself up and took stock of what had just happened I realized that I still had that little piece of “chrysanthemum rock” clutched in my fist. I slowly backed away towards dry land with the chuckling sound of the ocean slowly being replaced by the chorus of laughter from my friends on the warm sandy beach. Pat, Debbie and my buddy Ed said it was one of the funniest stunts I had pulled off yet…a one half turn with a nose plant finish.

Saturday, December 5, 2009

Who is "Solarsally"?

I have a 1957 Chevy pickup that my two boys Matt and Chris and myself have worked on for about 18 years now. There is always one thing or another to be done on the old girl but she just keeps on “keeping on”. We have spent many a night sleeping in her bed starring up at the stars with hot rocks from the fire wrapped in an old army blanket at our feet. We visited oh so many subjects talking about one thing or another, as the nights would wear on.

Originally she was called “Sally Greene”. The truck was from Eagle Rock, MO and was a deep powdery forest green. Sally was my grandmother’s name and the truck was green. We decided to use the extra “e” because…well…we could. Our fishing trips were often recorded in her flanks with one dent or another. Then the weekend after would be one of repair and repaint. Layer after layer the summers would wear on. Then one day came the inevitable…the engine rebuild.

Sally Greene had her engine rebuilt during a solar eclipse and that was not an "event slash coincidence" to go un-noted. So after she came back out of the shop…we repainted her and started treating her slightly better. Now she sports a flashy (almost tawdry) turquoise color and a very shiny finish, but make no mistake, this is still a lady o' the woods. She continued to made all of our fishing trips…but now we tried to find a kinder way to get her to the water’s edge. She became “Solarsally”, a true lady of the back roads and byways of Arkansas and Tennessee.


Today Solarsally lives in Washington State and this was her day to get a new rebuilt starter. She had a new clutch, pressure plate, throw out bearing, and re-surfaced flywheel last week. I tossed in a set of new rear view mirrors and sound deadening pads. Oh sweet joy…she is purring like a kitten in warm arms. Albeit I have the busted knuckles to testify to the events I still love every moment I’m in this old truck.

Tuesday, December 1, 2009

" Wave Length " A new piece.


This is a new piece that I just finished yesterday for the Sequim Arts Small Art Show. To qualify as small art the piece had to be 8” by 10” or smaller. I used an 8” X 8” square format turned as a diamond. I have recently been doing some research into the South Seas Stick Charts used by some Polynesian sailors. You can see some of that influence here in this piece I have named “Wave Length”.

I have used fir for the wooden parts. I severely stressed the soft summer grain with a sand blaster in the first “wave”. The second wave of wood has been gold leafed with a pine colored sizing in the background. While the third wave is a sheet of raised copper with a bit of the sawdust sprinkled onto the patina while it was still wet. This third wave is set with a “Tri-arc” broach with a black beach rock. The broach is removed and borrowed for your personal adornment and then returned to it’s “home” after you are through wearing it.

The idea of making a special environment for some of these jewelry pieces came from watching an individual literally throw jewelry into a cigar box when she was finished wearing a piece. Having spent a great deal of time and effort into conceiving and building the pieces, I found myself becoming increasingly annoyed at this on-going activity. So the idea of expanding the jewelry into a larger physical unit came into being.

I love the opportunity to continue an idea into a larger format and still keep some of the classical definition and criteria of the jewelry intact. Anyway…it was fun and quick exercise.

Sunday, November 15, 2009

New earrings this week


It was a fun week in the studio. The hands and the ideas were playing well together and there were no big problems to get in the way. Well... the portable hand wash station keeps leaking all over the studio floor but we can simply unplug that and it will wait for another day.

I have had these two pieces of turtle back rock material for several months now (see the image on the left). I was going to make another "and water cuts rock" pendant from them but I used a piece of chrysanthemum rock instead. I wanted to juxtapose some baroque pearls with the turtle back material to set off the "bumps". The idea of a pair of earrings gave me the opportunity to use twice as many pearls and the concept flew onto the sketchbook and things just took off on their own after that initial representation. Sometimes drawing an idea before it as had time to jell is like talking about a dream. The act of visualizing it changes it to the point that it is nowhere near what it was in your head. In this case nothing got in the way. It just went from an idea to a drawing and then into a piece.

The black basalt and red jasper earrings on the right are what I call "fifties streamline". I feel it harkens back to the look of a fifties corvette. It is what "streamline" was before the science of aerodynamics redefined the word. These earrings were a treat to put together. The mat surface of the basalt adds a purity and starkness to the overall design. They are now with their new owner at home in La Conner, Washington.

Sunday, October 25, 2009

Sunland Garden Party


We all had a very grand time getting to know each other in spite of the garden party being forced inside. There may have been an early dampening of the spirit outside but things inside were warm and hospitable indeed.

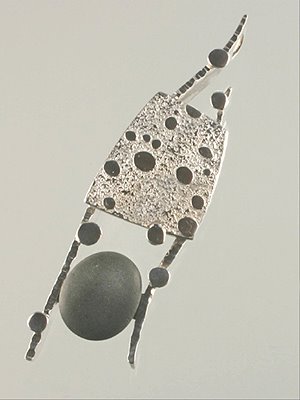
There was a lot of chatter over the new pearl and black beach rock pieces. It has turned out to be a stunning combination. I think the baroque freshwater pearls add a wonderful contrast to the weathered beach rocks. The luster of the Argentium sterling silver brings everything together.

A big “thank you” to Gin Friess and Karen Bulkeley for their help in making this delightful event possible. And a thank you to all that attended. We sincerely enjoyed meeting all of you. Next year we promise to have it earlier in the year so the “garden” part can actually happen.

the beach rocks

the beach rocks
Although I have been lucky enough to receive many accolades and awards during my professional career as a jewelry designer, I was nearly always fulfilling a commission and therefore the aesthetical concerns of my client. Now that I have relocated to the great NorthWest I am pursuing my own images for the first time since graduate school…and loving my craft with a renewed spirit.

deep currents

deep currents
This was inspired by the way the river's currents swirl around the rocks that sit on the bed of the river.

in the kelp bed

in the kelp bed
At times I let my mind wander to what is happening below...in the depths of the kelp beds. I image how the cold waters waft and drift along. I like to think about the serenity of life in the kelp beds.

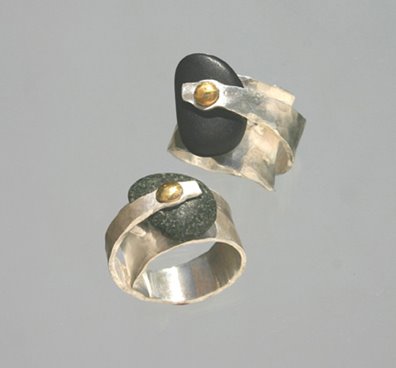
two six rings

two six rings
We called these rings "six ring" because when you see then from the side...in profile...they reminded us of the number six.