Saturday, October 12, 2013

Wyatt's Cuff


It was 2002 and I was in the lovely country of Italy with my boss Mr. Robert Mednikow and a small clan of other employees from Mednikow Jewelers of Memphis, Tennessee. I was the custom jewelry designer there and we were on a buying trip.  Bob (Mr. Mednikow) was a wonderful and gracious traveling companion for the most part.  He did like to have things his way but I guess that was to be expected given his position. Anyway during the trip we were seeing all the very latest jewelry fashions that the Italians had to offer. As it turns out Bob had lots of connections at the jewelry show and it seemed everybody knew him.

One day he introduced me to Pippo Perez, a flamboyant jewelry and watch designer. Bob and he were taking about a new line of leather goods that Pippo was showing and Bob was narrowing down his choose on an exotic purse for his wife, Betty.   I was distracted by Pippo's new watch line “Lucky Time” and was galvanized by one wrist watch in particular. It was dramatic, tailored and it had the most unusual leather band. The band was made of polished stingray leather. I had never heard or seen such a material. It was beautiful and filled with detail. A bit like ostrich leather but on a much smaller scale. That night at dinner Bob told me that he had bought that very watch and he wanted me to have it. Wow that was cool ( I did mention that he could be gracious, right?) and it was years before I saw any other pieces of stingray leather, aside from Betty's purse. Yes, it was made of stingray as well.

I can testify that I am not gentle with any of my jewelry. I guess it's because I can effect repairs myself if any thing goes awry. Anyway, after all these years that stingray strap looks about the way it did when I first put it on. The stuff just wears great and ages gracefully.

Philip's son is Wyatt and he was to have a cuff with a band's “glyph” on it as well. I had been wondering what I was going to do to match the sexy coolness of Philip's cuff of Mokume Gane. Of course you can see where this is going. The stingray leather cuff with some sterling accents was going to be a fairly straight forward project and it also solved the problem of resizing the piece as Wyatt grew. It was also fortuitous because Chloe's project was next and it was going to take considerable time. Thank goodness stingray leather is available at most leather shops these days, you can even order it from TandyLeather. I highly recommend that you seek out some of this material. Wyatt's cuff should serve him well and it will easily adjust to fit him as he grows.


Tuesday, March 19, 2013

Mokume Gane Cuff for Philip


Mokume Gane is a Japanese term that roughly translates to mean “wood-grain in metal”. It was always one of those ancient mysteries of the orient. Primarily it was a metal billet formed from layers of metals that varied greatly in color. These billets were then shaped and deformed to bring out brilliant patterns on the surface. This metal technique was seen mostly in the furnishings of samurai swords. These uses included handles, guards and the sheaths of these weapons. Mokume Gane was highly secretive process that was passed on from artisan to artisan in an oral tradition.

The process of forming these multilayer billets predated technology and as such the process was controlled and duplicated by religious constraints. The temperatures were often regulated by the colors of a rising sun and the timing by the length of a chant or song. Oral traditions are easily broken as the number of participants dwindle. By the beginning of the twentieth century the secrets of Mokume Gane were thought to have passed beyond recall.


Fast forward to the rise of “Metal Arts” in American colleges and Art schools during the late sixties and early seventies. During this time period there was a wide spread attempt to reproduce the look of Mokume Gane using modern techniques. Many artisans used layers of different colored metals soldered together with silver solder to mimic the ancient art form. The results these efforts produced were very limiting, superficial and mostly unsatisfactory. There were wide spread rumors in the metal art world of individuals that wanted to make excursions into the orient to interview the old artisans of the knife guilds to try to glean some of the old ways. It was a hope that this information might result in a translation of the old oral tradition into modern metallurgy. It is not the scope of this article to explore who went where and discovered what. It is a fact however, that today one can obtain information that will result in a very satisfactory Mokume Gane billet regardless of how close it adheres to the materials of the seventeenth century. I bring your attention to the materials, publications, classes and lectures of such metal artists as Steve Midgett, James Binnion and the metal wizard I have watched closely, Phillip Baldwin.

Speaking of “Phillips” my client Philip wanted us to make a cuff for him that would turn heads and start conversations. He wanted something classy but still with a lot of eye appeal. I thought that Mokume Gane would be just the thing. I have always admired subtle things like fine Irish linen, where the closer you look the more there is to see. Sometimes you have to just sit back and let the material do the talking.

The cuff form itself was shaped in a hydraulic press with tooling that I made myself using magnets and mild steel. There was a lot of experimenting using copper and brass blanks to get the shapes and lengths just right. It was more than once I nearly gave my finger a good pinch in the press. But after a bit of time, some patience and a bunch of tweaking the project started to come around. My hydraulic press is an old “Bonny Doon” from years ago. We don't use it as much as we should and sometimes we even forget that it's in that far dark corner of the studio just under the breaker panel.

My plan was to keep this piece fairly simple and rely on the materials and “glyph” to do the heavy lifting. This is the Mokume Gane cuff that I made for him with the ever present band “glyph” on top.
 

Monday, March 18, 2013

A New Piece for Susan


We have a client that calls on us about once a year to make some very cool pieces for his family. It turns out that they (the entire family) are big fans of a particular band that is “off grid”. And as such, this band has an entirely different kind of following. Many of these followers will go from place to place as the band pays different venues. The band has it's own tee shirts, albums, cd's, and basically all sorts of merchandise including their own tequila. Our client, Philip sends us what he calls “glyphs” and gives us a few hints as to colors, type of jewelry wanted and price range and then we “dress up” these “glyphs". This year was a banner year for this project. We were allow a generous budget and the choice of materials was wide open.
 
Susan, his wife was to get a necklace and seashell and the “glyph” were the only parameters given. Well I have always wanted to work in Paua shell inlays. The Paua shell is really the colorful iridescent inside area of an abalone shell. I wanted to use the greens and blues often found in this enticing material.
I had to do a lot of research in a hurry to know what was needed and what the procedure was for turning the chunky abalone shell into the fine thin colorful inlay material I needed. As it turns out, the dust created when you grind away the over burden from the shell is very toxic. Please do not try this without a through investigation. I found the technical staff at RioGrande an invaluable resource for many of the aspects of this project.
After building the center element using a curved sided triangle as a focal element I then finished the tedious process of the inlay. I then covered this element with the “glyph”. All that was needed now was the stringing of the “Raven's Wing” pearls and the sterling letter blocks. The overall effect was rich and almost intoxicating not entirely unlike that of an exotic dark chocolat (apologies to Joanne Harris).
 

Monday, January 21, 2013


A Greenleaf for Ed


My buddy Ed gave me an old gold ring of his a few years back. I always wanted to reuse the gold in making him an "Art Pin" that he could wear to openings and parties and such as that. I just couldn't think of what would be appropriate for him to wear. But e few weeks ago just after Thanksgiving an idea came to me.

I remember visiting the “North Carolina School of Performing Arts" many decades back...as mater of fact...back in the 70's in my serious hippie daze. One of the drills the instructors would used to strip your personality away so you could over print the role of the person you were to play was to make your own name unimportant. They would train you to do this by making you repeat your name out loud over and over again to the class for 5 minutes or so. Try it some time (but maybe in the privacy of your own home). After a few minutes your name starts to be just a bunch syllables. It starts to lose importance and even meaning...just a bit of noise. In any case the same thing happened to me with Ed's last name. I had heard and used it so often over the years that I had forgotten how unusual it was...”Greenleaf”.

The solution for the subject matter of the “Art Pin” was of course now very self evident. It just had to be a “green leaf”. So I charged into the task armed with some room temperature curing specialty resins the gold from his old ring and some sterling.

I wanted the outline of the leaf to be very stylized and simple but I wanted the surface to look very rich. Kind of like the look of a dollop of mint jelly in a silver spoon. The first sample was okay but it lack the lush look of jelly. The images I had seen of Basse Taille enameling where the back metal surface is engraved or carved before the enamel applied was what I was after. A heart bur was just the ticket needed to cover the background silver with a field of “poppy seed” bright cuts to reflect the light back through the enameling.


After a few more test runs the finished product was just what I had hoped for, a “green leaf” pin for Ed.


Thursday, June 30, 2011

The Rain Chain that Splashed


A while back a lady from Port Townsend asked me to makes a set of four matching hooks. She wanted to put two hanging baskets on either side of the entrance to her bungalow. She couldn't find anything in the local "big box" store that had any character. She was also very particular as to the length of each long hook.
It was a project that I knew I was going to have fun with and I was all over it. It was fairly wide open and really a hook is a very straight forward devise that easily succeeds. Conceptually I gravitated towards the idea of a vine. We used to have this native clematis vine that got into a holly tree and went crazy. It was ascetically beautiful but it was chocking the life out of the poor holly. We were forced to cut it back severely. But I still missed the way it looked. My new hook for the potted plants was to borrow that twisted vine look.
Trying to satisfy my customer...I made many of these vine hooks in various lengths and hung them one under the other suspended from the gutter on our house so I wouldn't forget to take them to the street fair the next Saturday. As soon as I hung the up and stepped back I realized that I had made a "rain chain".  The lady with the bungalow was delighted and took all the hooks I had made. 
Since this is the year that I decided that I was going to start keeping and using my own art in my own yard, I have made a bunch more of what we now call the "rain chain" link.  I have been using these "rain chain" links all over the yard. Really, they don't do anything that a bent coat hanger wouldn't do...but they sure do look better. I particularly like them chained together and hung under the Maple tree out back like a vine. It's like a vine that never dies and never grows. And a vine that never dies is cool but (since our adventure with the native clematis and the holly tree) a vine that never grows is way better.

I have since discovered that if you open up the hooks at the ends...the links will fit over the outside of the rain gutter. This makes them absolutely fantastic for positioning bird feeders and the like so they are squared up in front of a window and close up enough so you can watch
those little scamps playing around. You also get the added advantage of being able to easily move them around without putting a bunch of drill holes under your eaves.
So just about now you are asking yourself...this has been a nice little story ...but what about the "splash" that was promised in the title? Well Dungeness Studios is in Dungeness, Washington and we only get about 9 inches of rain a year. So this "rain chain" works great for us. But I wanted to test it out in heavier rain conditions before offering it to other people as a "rain chain". So I climbed out on the roof and using the water hose I ran a bunch of water into the gutter to see how it worked with a real "toad choker" of a rain. It unfortunately, was a splashy failure in heavy rain. But it still works great here in the "blue hole" rain shadow and I love them as decorative hooks. We are always finding another way to use them and would love to hear how you are using yours.  By the way, The finches love to sit on the different loops in the vine as they work their way down to their turn at the feeder.

Tuesday, June 21, 2011

The "Snail Army"


One of my very first projects at Dungeness Studios was getting our garden shaped up for it's first season. For those of us that garden we know that the first year can be really busy and entirely too short. I wanted to get the lay of the land before starting this protracted endeavor so one of our first local trips was to the Hoh Rain Forest. There we were introduced to one of the Olympic Peninsula's more infamous inhabitants...The snail and his giant cousin the slug. My goodness you could throw a saddle in one of these bad boys and ride them home in a pinch. Well I had met the enemy and they were mighty. So I started my research of them.

It turns out that there is a widely held belief that if a snail or slug tries to cross over a strip of raw copper will cause some sort of galvanic response and the critter will turn around and find another course to it's meal. Being a jeweler I certainly had a readily available supply of copper and being a member of the junior league of scientists...I still have the secret decoder ring to prove it...I set up an experiment. I put both slugs and snails on top of a stump I use for forming copper and surround them with a triangle of copper strips. I then got myself a stool and a pair of magnifying visors and sat down to make my empirical observations. I am here to tell you that they didn't stop and turn around...they did try to arch over the copper...they didn't even flinch in the slightest. They just slimed their way on over to the other side. So much for that "Old Wives Tale" as Kari would say on the Television show "Myth Busters" it was "totally busted".

Now as it turns out, my plan B was to be very interesting indeed. I decided that instead of engaging this multitude in battle...I would celebrate their tenacity. I started making a little pieces of "garden art" that would pay a small homage to these stalwart denizens of the damp and decaying. I turned to red hot steel, the anvil and the hammer. I began forging one steel snail after another making about a dozen before I started to slow down. They were flying off the anvil due by a large measure to the simplicity of the form. I was happily applying a drawing skill that we often used in undergraduate art school. The drill was called economy of line. Basically it means to try to convey visually a concept using as few lines as possible. And so the basic image of my garden snail was reduced to just two lines. One of those lines was to also be the stand that set it into the garden. As these individual units began to pile up in the garden I came to realize that I was building a "Snail Army". And just like in boot camp...these new recruits looked very confused. Some looking one way while others were looking behind them. Some were even cross eyed. Some looked like they were toiling their way uphill while others looked to be headed helter skelter like a run-a-way train down hill. Then it came to me, I had to be out of my mind. There was no way that I was going to build snails and voluntarily install them in my garden. There had to be some kind of return on the effort. As my buddy Eddie would say, "It ain't gonna happen". I needed something...some task that this little army could help me with...some positive contribution to the whole.


As you probably know from previous posts...we live in a Rain Shadow called the "blue hole". It can be a heart warming to come home from a long trip through two hours of rain in the south to find sunshine as we round the bend and return to cabin 82. But only 9 inches of rain per year also means you have to be prepared for watering. "Taadaa" I'll teach these little devils to hold the water hose for me. Okay...I realize that holding a water hose is not exactly highly skilled labor but let's face it...they are snails. There's not a lot up there to work with. A few of the solders in the "Snail Army" picked up on this (now mandatory) skill and soon the entire corps was in step so to speak. Now we gardeners know there is a great multitude of sundry devises for watering a lawn or garden, but where the "Snail Army" has the strategist advantage is small jobs. Maybe you have a newly transplanted tree that needs watering in or just a tiny bit of weeding in your strawberry patch could use some softening, the "Snail Army" stands ever at the ready. Just hand them a hose and sit back with your glass of iced tea and wait.

Saturday, June 18, 2011

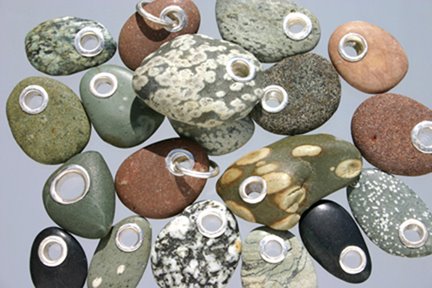
the beach rocks...three stone necklace


Ever since we started making the distinctive rings in this series, I have wanted to do a five stone necklace in the same style. I started building the necklace on Tuesday and quickly realized that it was going to be too heavy for what I was wanting. So the three stone necklace came to be.

It has all the smooth clean and tailor lines that were in the rings. I added a toggle catch to give it the versatility of being worn in two different lengths. I really like the weight...it feels like a substantial piece of jewelry without being a burden to wear. The colors...which may not show up all that well in this presentation, are a medium black beach rock in the center with very dark green rocks on either side.
I still want to make a five element necklace using beach rocks...it occurred to me while building the three unit piece that I could make some hollow "rocks" out of silver to use as spacers and help keep the weight down. I have some ideas about a more outrageous looking chain as well. I can hardly wait to see the next generation in this series.

the beach rocks

the beach rocks
Although I have been lucky enough to receive many accolades and awards during my professional career as a jewelry designer, I was nearly always fulfilling a commission and therefore the aesthetical concerns of my client. Now that I have relocated to the great NorthWest I am pursuing my own images for the first time since graduate school…and loving my craft with a renewed spirit.

deep currents

deep currents
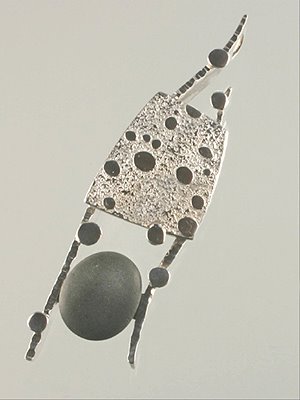
This was inspired by the way the river's currents swirl around the rocks that sit on the bed of the river.

in the kelp bed

in the kelp bed
At times I let my mind wander to what is happening below...in the depths of the kelp beds. I image how the cold waters waft and drift along. I like to think about the serenity of life in the kelp beds.

two six rings

two six rings
We called these rings "six ring" because when you see then from the side...in profile...they reminded us of the number six.